Defragmenting a hard drive in Windows 7

Photo by dno1967 from Flickr
A: When writing information to your hard drive, Windows usually breaks the files into pieces, stuffing them into whatever empty space it can find.
When retrieving a file, Windows rummages for those scattered pieces, which takes a little time. To speed things up, Windows includes a disk defragmentation program: The program gathers up all those scattered bits, and files them away next to each other, so Windows can grab them more quickly.
Unlike early Windows versions, Windows 7 automatically defragments your drives every week, usually at 1 am on Wednesday. (Early Windows versions made you run the Disk Defragmentation program manually, a chore many people simply forgot about.)
You can see Windows 7’s automated defragmentation schedule (and make sure that it’s running on schedule) by following these steps:
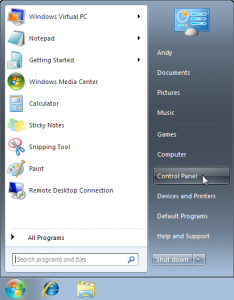
- Click the Start button and click Control Panel.
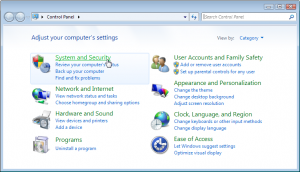
- Click System and Security.
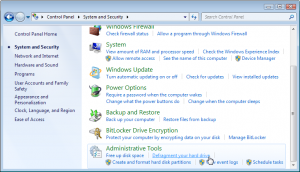
- In the Administrative Tools section, click Defragment your hard drive.
There, you’ll see a list of all your drives, with their defragmentation percentage. (If Windows 7 has been working its defragmentation magic automatically, as it should, you’ll see “0% fragmented,” along with the time and date the defragmention program last worked.
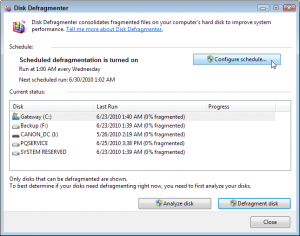
If you don’t leave your computer turned on in the evenings, though, the defragmentation program won’t be able to run. If that’s the case, tell Windows 7 to defragment the drives at a different time, perhaps during your lunch hour when you’re away, but your PC’s still turned on.
To do that, click the Configure Schedule button.
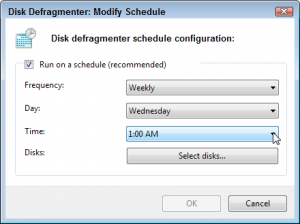
There, you can choose a different time or day; schedule the defragmentation to take place daily, weekly, or monthly; or even tell Windows to defragment different disks on different schedules.
Click OK after making any changes.
Posted: June 28th, 2010 under Hardware, Windows 7 for Dummies.
Tags: changing defragmentation schedule, defragmentation, defragmenting your hard drive

