How do I add something to Windows 7’s “Send To” menu?
 Q: I like Windows’ “Send To” menu, which appears when I right-click on a file or folder.
How can I add my own entries to Windows 7’s Send To menu?
I want to add a folder, for example, so I can right-click an item, choose Send To, and send it to that folder.
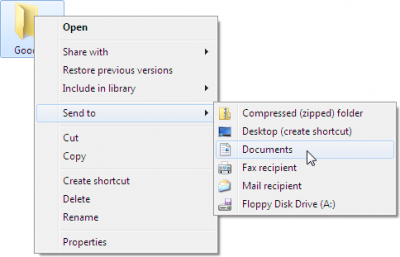
A: When you right-click a file or folder in Windows XP, Windows Vista or Windows 7, a pop-up menu appears; one of the options is Send To. Choose it, and a pop-up menu appears, listing all the places you can send that file or folder.
Many of your programs have already added themselves to your Send To menu. That lets you right-click a photo, for example, choose Send To, and select your favorite photo editing program. When the program loads, your picture’s already waiting to be edited.
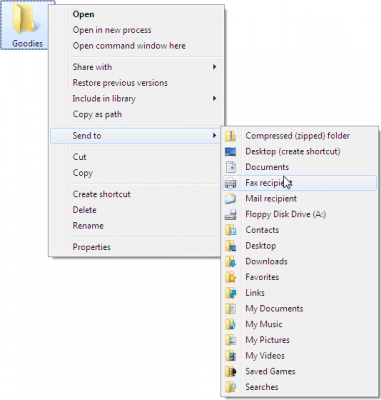
Windows 7 adds another trick to the Send To menu: Hold down your Shift key while right-clicking an icon, and the Send To menu automatically sprouts even more destinations (shown below).
If those aren’t enough destinations, add your own places to Windows 7’s Send To menu by following these steps:
- Open any folder.
- In the location bar along the folder’s top, click at the end of the folder’s path name. (That highlights the path name.)
- Press the Del key to delete the path name.
- Copy and paste the words you see below into the location bar, and press Enter. The SendTo folder will appear, listing all the current items listed on your SendTo menu.
shell:sendto
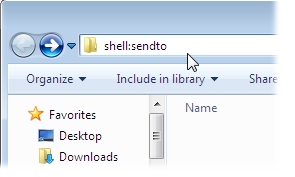
The folder’s location bar will look like the one below.
Now, customize your Send To menu by adding your own favorite shortcuts. Every shortcut in that folder will appear as a destination on your right-click’s Send To menu.
Add your own shortcuts to that folder in any of these ways:
- Right-click any existing shortcut, perhaps one on your Desktop, and choose Copy. Right-click inside your SendTo folder and choose Paste.
- While holding down the right mouse button, drag and drop a program or folder’s icon into the SendTo folder. When you let go of the mouse button, choose Create Shortcut.
- Right-click inside the SendTo folder, choose New, then choose Shortcut. Click the Browse button, and navigate to your desired folder or program. Click Next, type a name for your Shortcut, and click Finish.
- Drag and drop any item from your Start menu into the SendTo folder to create the shortcut.
Tip: I like to put Notepad, Windows 7’s built-in text editor, on the SendTo menu. That gives me a quick way to peek into files.
Posted: January 2nd, 2011 under Windows 7.
Tags: add something to send to menu, customize send to menu, right-click send to menu, send to, sendto


