Adjusting a microphone in Windows 7 or Vista
 Q: I am new to Windows 7. I am trying to work with Skype, which uses a headset to send and receive voice messages.
Unfortunately, my headset’s microphone doesn’t seem to be working.
Before I invest in another headset, I want to be sure that my microphone is not being “muted” by a setting inside my computer.
How do I access the status of the microphone settings inside the computer?
A: Microsoft recently bought a company called Skype, which lets people talk to each other through an Internet connection rather than phone lines, saving considerable cash.
Microsoft will probably incorporate Skype into its products, and I wouldn’t be surprised to see it show up inside Windows 8 later this year.
Until then, though, Windows Vista and Windows 7 offer the same ways to make sure your headset’s microphone works correctly.
To test and adjust your microphone, follow these steps:
- Right-click the Sound icon (the little white speaker) in your taskbar by the clock.
- When the pop-up menu appears, choose Recording Devices.
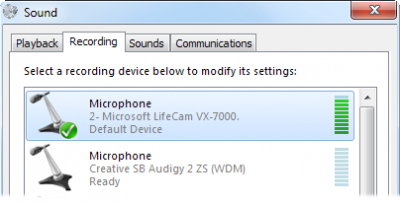
- When the list of recording devices appears, speak into the headset’s microphone and watch the bars next to that device.
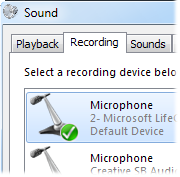
 The green bars should raise and lower to reflect your voice’s volume, as shown in the figure to the left.
When those bars move constantly as you speak, you know that the microphone is picking up the sound of your voice.
Don’t see any wavering green bars? Then something’s wrong, and you need to probe further.
Set the microphone as the Default Device
Notice the green check mark next to the first microphone shown to the left?
That means it’s the “Default device,” which is the microphone Windows currently listens through. (Many computers offer two or more microphone options.)
If your headset’s microphone isn’t listed as the default device, follow this step to change it:
- Right-click the microphone’s entry, choose Properties, and choose “Set as Default Device.”
Check the microphone’s levels
After setting the microphone as Default Device, follow these steps to check its sound recording levels.
- Right-click the microphone’s entry, and choose Properties.
- When the Properties box appears, click the Custom tab.
- Select the Microphone Boost or AGC check box to amplify any weak signals.
- Click the Levels tab.
- Adjust the volume slider to the level that you want, and then click OK.
- Click OK to close the Sound dialog box.
Although these are the basic settings included in Windows 7, different computers may offer slightly different settings. Many manufacturers install their own settings panels that override Windows 7’s built-in settings.
For more information, drop by Skype’s own microphone setup page. It offers detailed instructions and screenshots.
Microsoft also offers an automated FixIt program on its website that claims to fix some microphone issues in Windows 7. I haven’t tried it, but it’s worth a try if these instructions haven’t helped.
Posted: January 16th, 2012 under Hardware, Windows 7, Windows Vista.
Tags: adjusting microphone volume, microphone, skype
