Welcome to Andy Rathbone's Web site

Site menu:

I'm one of today's best-selling computer book writers, with more than 15 million books in print.

This website keeps you up-to-date on my books, and your computers. Each week, I answer a reader's question on-line.

Windows 11 For Dummies on sale now!

Windows 11 For Dummies

Drop by Amazon.com for big discounts on Windows 11 For Dummies.

Site search

Popular Posts

Recent Comments

Categories

Turning off the popup: Do you want to view only the webpage content that was delivered securely?
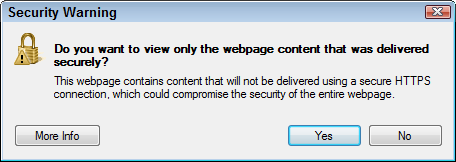
Do you want to view only the webpage content that was delivered securely?Q: On Internet Explorer, I keep seeing the security warning “Do you want to view only the webpage content that was delivered securely?”

This happens when I’m on sites I visit daily. And it drives me crazy, because it appears on every page of the site.

How do I eliminate it?

A: Many webpages are created to handle secure transactions. You don’t want anybody snooping when you enter a password, for example.

But there’s a problem when one portion of the web page handles the password, but another portion of the page displays something that doesn’t need to be secure: a weather report, for example.

In engineering lingo, that page is serving mixed content. Microsoft’s engineers know that some malicious sites can mix secure and insecure content to trick you, perhaps tricking you into entering your password on the wrong page.

But if you’re tired of seeing that message constantly appear, disable it by following these steps: Click to read more »

How can I retrieve a forgotten Windows 7 password?

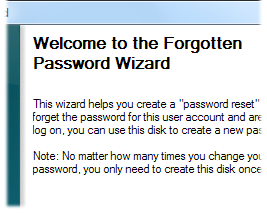
Create a Password Reset Disk now, before you forget the password.Q: My friend forgot his Windows 7 password.
If I give him my Windows 7 System Repair Disc, can he restore his system to a point before he gave it a password?

And will my System Repair Disc work on his computer?

A: First, a lost password isn’t a problem in Windows 7.

It’s no problem at all, if you create a Password Reset Disk before you forget the password.

So, reader — yes, you — take a moment to create a Password Reset Disk on your Windows 7 computer by following these steps: Click to read more »

Stopping media players from fighting over your music

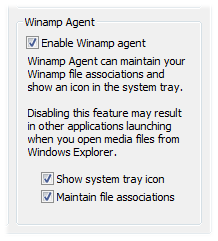
Uncheck "Winamp Agent" to keep Winamp from being the default program.Q: Windows XP won’t remember my choice of media players.
When I right-click a music file and choose Play from the pop-up menu, I choose Windows Media Player. I also click the box that says, “Make this player default.”

But the next time I open a music file, a different media player opens the file. Right now, a media player called Creative MediaSource that came with my sound card takes control again and names itself “King.”

How can I stop it from always taking over control of my music?

A: Every music player on your computer wants the right to play your music.

Because of their possessiveness, you may find yourself handling arguments between iTunes, Windows Media Player, and even that odd music player bundled with your new sound card.

Sure, you can go through the steps of choosing your default music player by choosing Start -> Default Programs (Windows 7, Windows Vista) or Start -> Set Program Access and Defaults (Windows XP).

But even after you’ve gone through that trouble, one player keeps taking over.

The culprit? Some older media players include a special setting that makes them verify that they’re the default player each time they’re loaded. If that player discovers that a different program is the default player, the newly loading player snatches back that right for itself.

To stop that program from hogging the default player setting, you need to turn off a hidden setting in your rogue media player. But how do you find the setting?

It’s not easy. Different players use different language and different menus. But start by finding the Options or Preferences menus, and then looking for the words “default” or “file associations.” When you find those options, turn them off, and you’ve solved the problem.

The figure at the top of this page, for example, shows how Winamp’s “Enable Winamp agent” setting tells it to grab the default player setting whenever it’s loaded. Turning off the “Enable Winamp agent” setting from the Preferences menu stops Winamp from hogging the default player setting

Putting a program’s icon back onto the Start menu

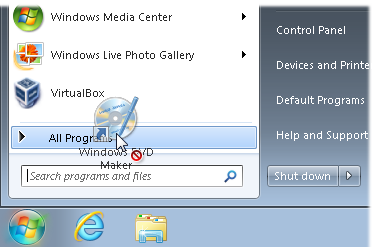
Drag an icon to the All Programs area and wait for the menu to open.Q: I wanted to copy a program’s icon from the Start menu to the Desktop, but something went wrong.
Now the icon has disappeared from the Start menu’s All Programs area, and it’s only on the Desktop.

How do I put the icon back on the Start menu’s All Program’s area?

A: Like many things in Windows, the Start menu’s icons can be dragged around on your screen.

Unfortunately, that means a slip of the wrist can drag a program off its rightful place from the Start menu, and onto the adjacent Desktop.

Follow these steps to put a misplaced Desktop icon back onto the Start menu:

  1. Hover your mouse pointer over your misplaced Desktop icon.
  2. Hold down your right-mouse button. (This selects the misplaced icon for action.)
  3. While holding down your right-mouse button, point at the Start button, as shown in the figure above. (After a moment, the Start menu opens.)
  4. While still holding down your right-mouse button, point at the Start menu’s All Program’s area. (After a moment, the All Program’s menu opens.)
  5. While still holding down your right-mouse button, point at the menu area where you want to place your icon. (If your icon lived within its own folder in the Start menu, keep your right-mouse button held down while navigating to the icon’s original folder.)
  6. When your icon hovers over its original Start menu folder, let go of the right mouse button.
  7. When the menu appears, choose either Copy or Move to copy or move the icon back to its rightful place on the Start menu’s All Programs area.

These steps actually reverse your first action, but the safety of holding down the right-mouse button lets you choose to copy the icon back to original position on the Start menu.

Or, if you don’t want the copy on your Desktop, choose Move instead of Copy.

Tip: To prevent these mishaps, always drag while holding down your right mouse button. Then, when you drop the dragged icon, a menu asks if you’d like to Copy or Move the icon. Choose Copy for the best of both worlds: The icon stays on the Start menu, and a shortcut to that icon lives where you choose to drop it.

Removing old photos from Windows XP’s Photo Printing Wizard

How to delete old or unwanted photos from the Photo Printing Wizard.Q: I just received an e-mail with an attached photo.

When I tried to print the photo with Windows XP’s Photo Printing Wizard, I found other, older photos that looked like they’d come from the Internet rather than e-mail.

How do I delete those old, unwanted photos from the Photo Printing Wizard?

A: Windows Photo Printing Wizard tries to make it as easy as possible to print photos that arrive as e-mailed attachments.

First, the Wizard copies those attached photos into a temporary folder, giving you time to ponder options like printing size, printing paper, and other printer necessities. Unfortunately, Internet Explorer also uses that same temporary folder, usually to hold images from websites you’ve visited or photos you’ve saved previously.

The solution? Tell Internet Explorer to clean up after itself and delete those older images.

Follow these steps to remove the older, unwanted photos: Click to read more »